ComfyUI教程
ComfyUI如何使用ControlNet从图像到控制向量的转换?
在此进阶教程中,我们将深入探索 ControlNet 工具的高级应用,帮助您充分利用现有的图像资源,并将其转化为 ControlNet 可以使用的图像格式,如 Pose 图和 Depth 图。接下来,我们将详细介绍各种插件的安装与应用流程,使您能够从基础到高级,全面掌握 ControlNet 的使用技巧。
工具与模型的准备
在开始之前,请确保已下载并安装以下模型:
- Dreamshaper:用于梦境塑形的模型,安装在 ComfyUI 的
models/checkpoints目录。 - ControlNet Scribble:用于绘制粗略草图的 ControlNet 模型,放在
models/controlnet目录。 - ControlNet Openpose:用于生成姿势控制图的模型,同样放在
models/controlnet。 - ControlNet Canny:用于生成 Canny 边缘控制图的模型,存放在
models/controlnet。
生成 Canny 图的工作流
使用 Canny 方法可以从已有图片生成边缘图,这比生成手绘风格的 Scribble 图更为精确。

1. 插件下载与安装
首先,需要安装一个名为 ComfyUI's ControlNet Auxiliary Preprocessors 的插件,可通过 ComfyUI-Manager 进行安装。这里我已经帮大家下好了,关注下方公众号回复 ComfyUI 获取ControlNet Auxiliary网盘链接。

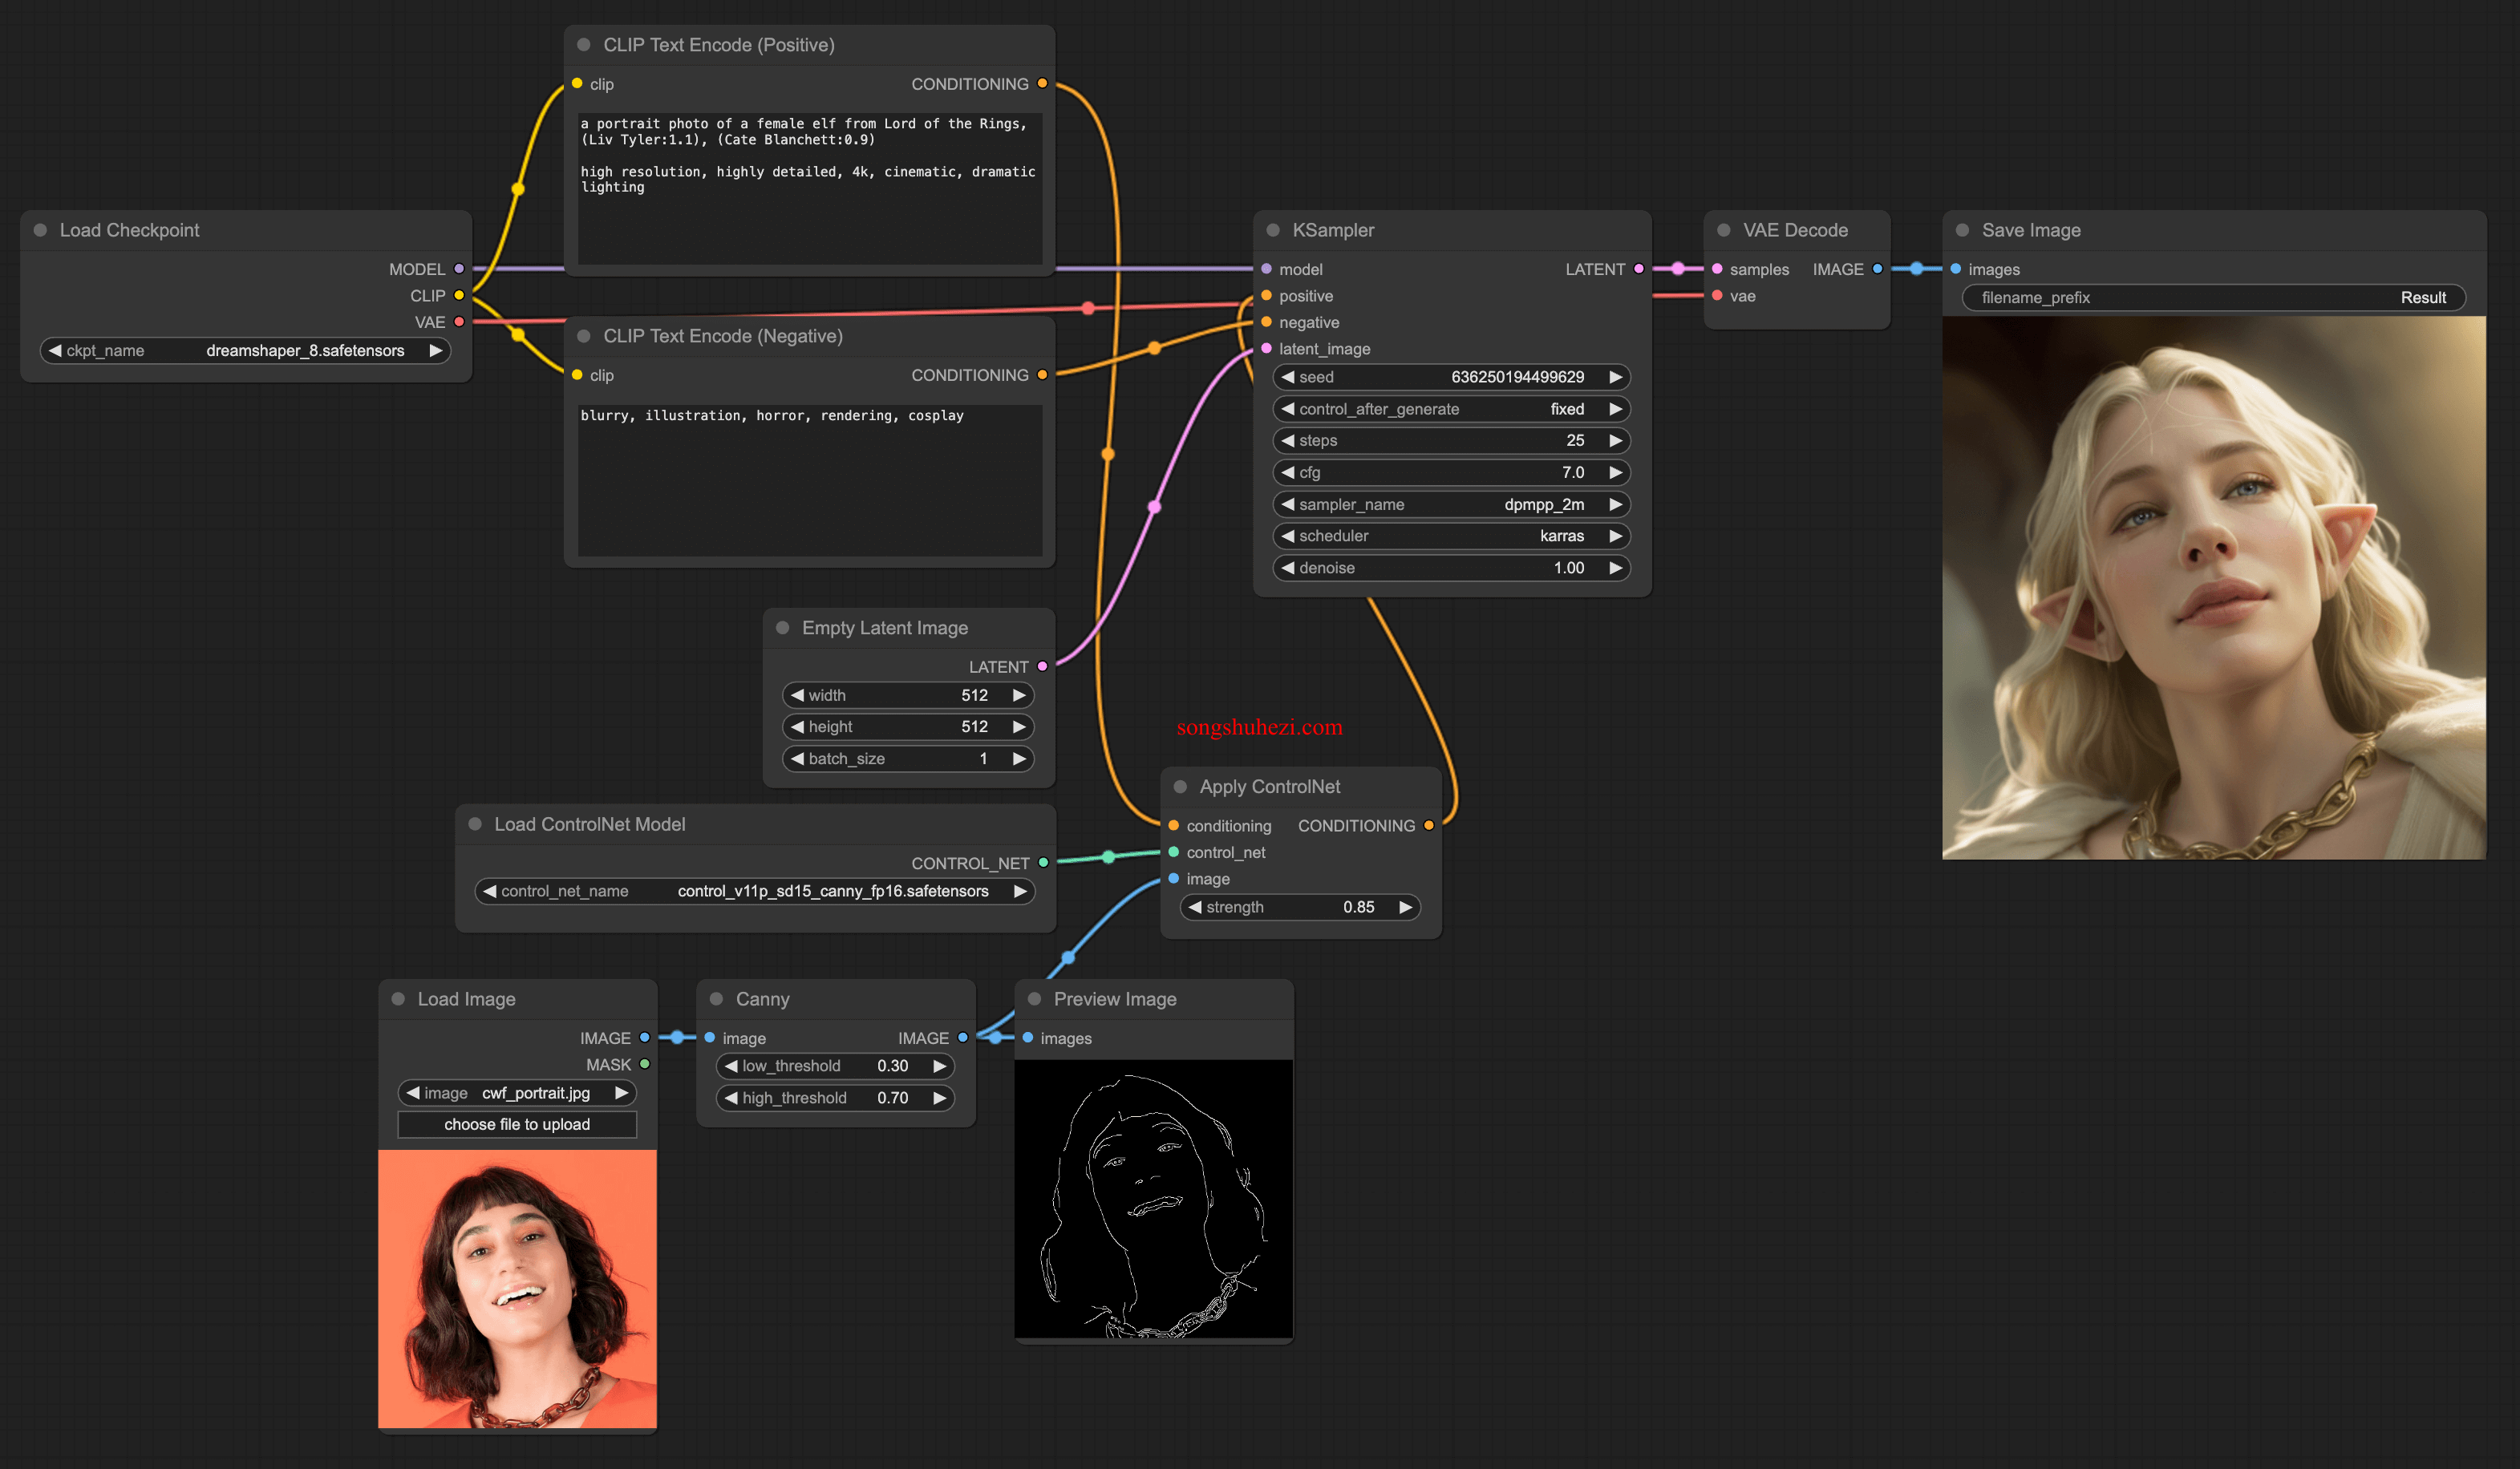
2. 插入 Canny 节点
创建或加载一个包含 Canny 节点的 workflow。操作步骤如下:
- 在 ComfyUI 中打开或新建一个 workflow。
- 双击空白处,在搜索框中输入“Canny”。
- 添加 Canny 节点并连接至 Load Image 节点和 Apple ControlNet 节点。
- 如需查看 Canny 图,可在 Canny 节点的输出端添加 Preview Image 节点。
最终的 workflow 应如下图所示:
生成 Pose 图的工作流
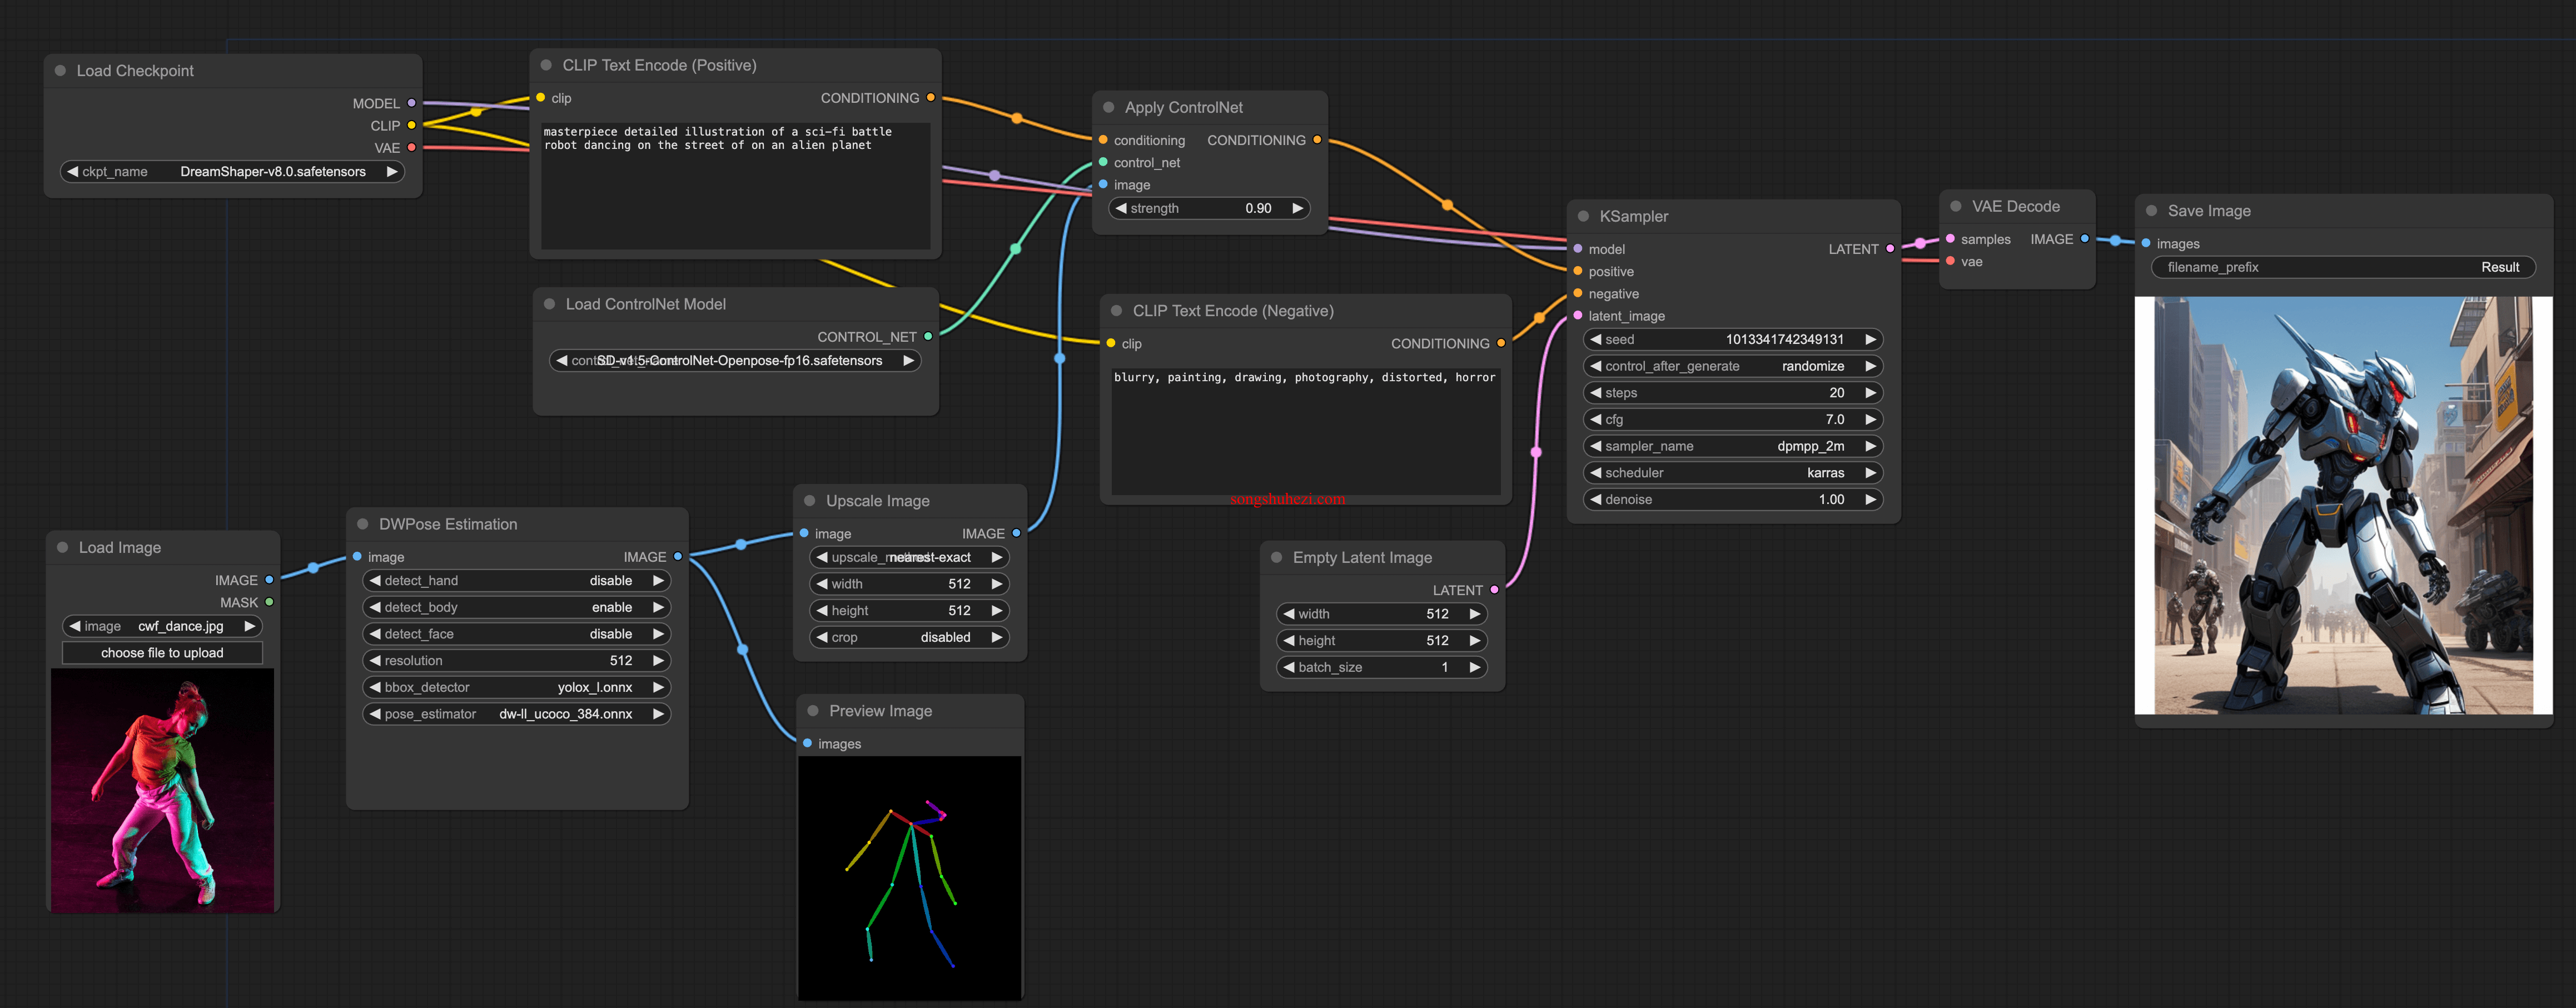
1. 插入 DWPose Estimation 节点
如果你需要从图像中生成控制姿势的向量,可以使用 DWPose Estimation 节点。操作步骤如下:
- 双击空白处,在搜索框中输入“DWPose Estimation”并添加此节点。
- 连接 Load Image 节点至 DWPose Estimation 节点。
- 配置参数如下:
- detect_hand: disable
- detect_body: enable
- detect_face: disable
- resolution: 512
- bbox_detector: yolox_l.onnx
- pose_estimator: dw-ll_ucoco_384.onnx
2. 增加 Upscale Image 节点(可选)
为确保图像分辨率与 ControlNet 输出一致,可添加 Upscale Image 节点:
- 将 DWPose Estimation 节点的输出连接至 Upscale Image 节点。
- 配置 Upscale Image 节点的参数,确保图像大小与输出匹配。
最终的 workflow 如下图所示,其中包括可选的 Preview Image 节点,用于预览生成的 pose 图。
深度图与参考图的应用
Image depth workflow:目前正在修订中,将在后续版本详细介绍。
Reference-only workflow:
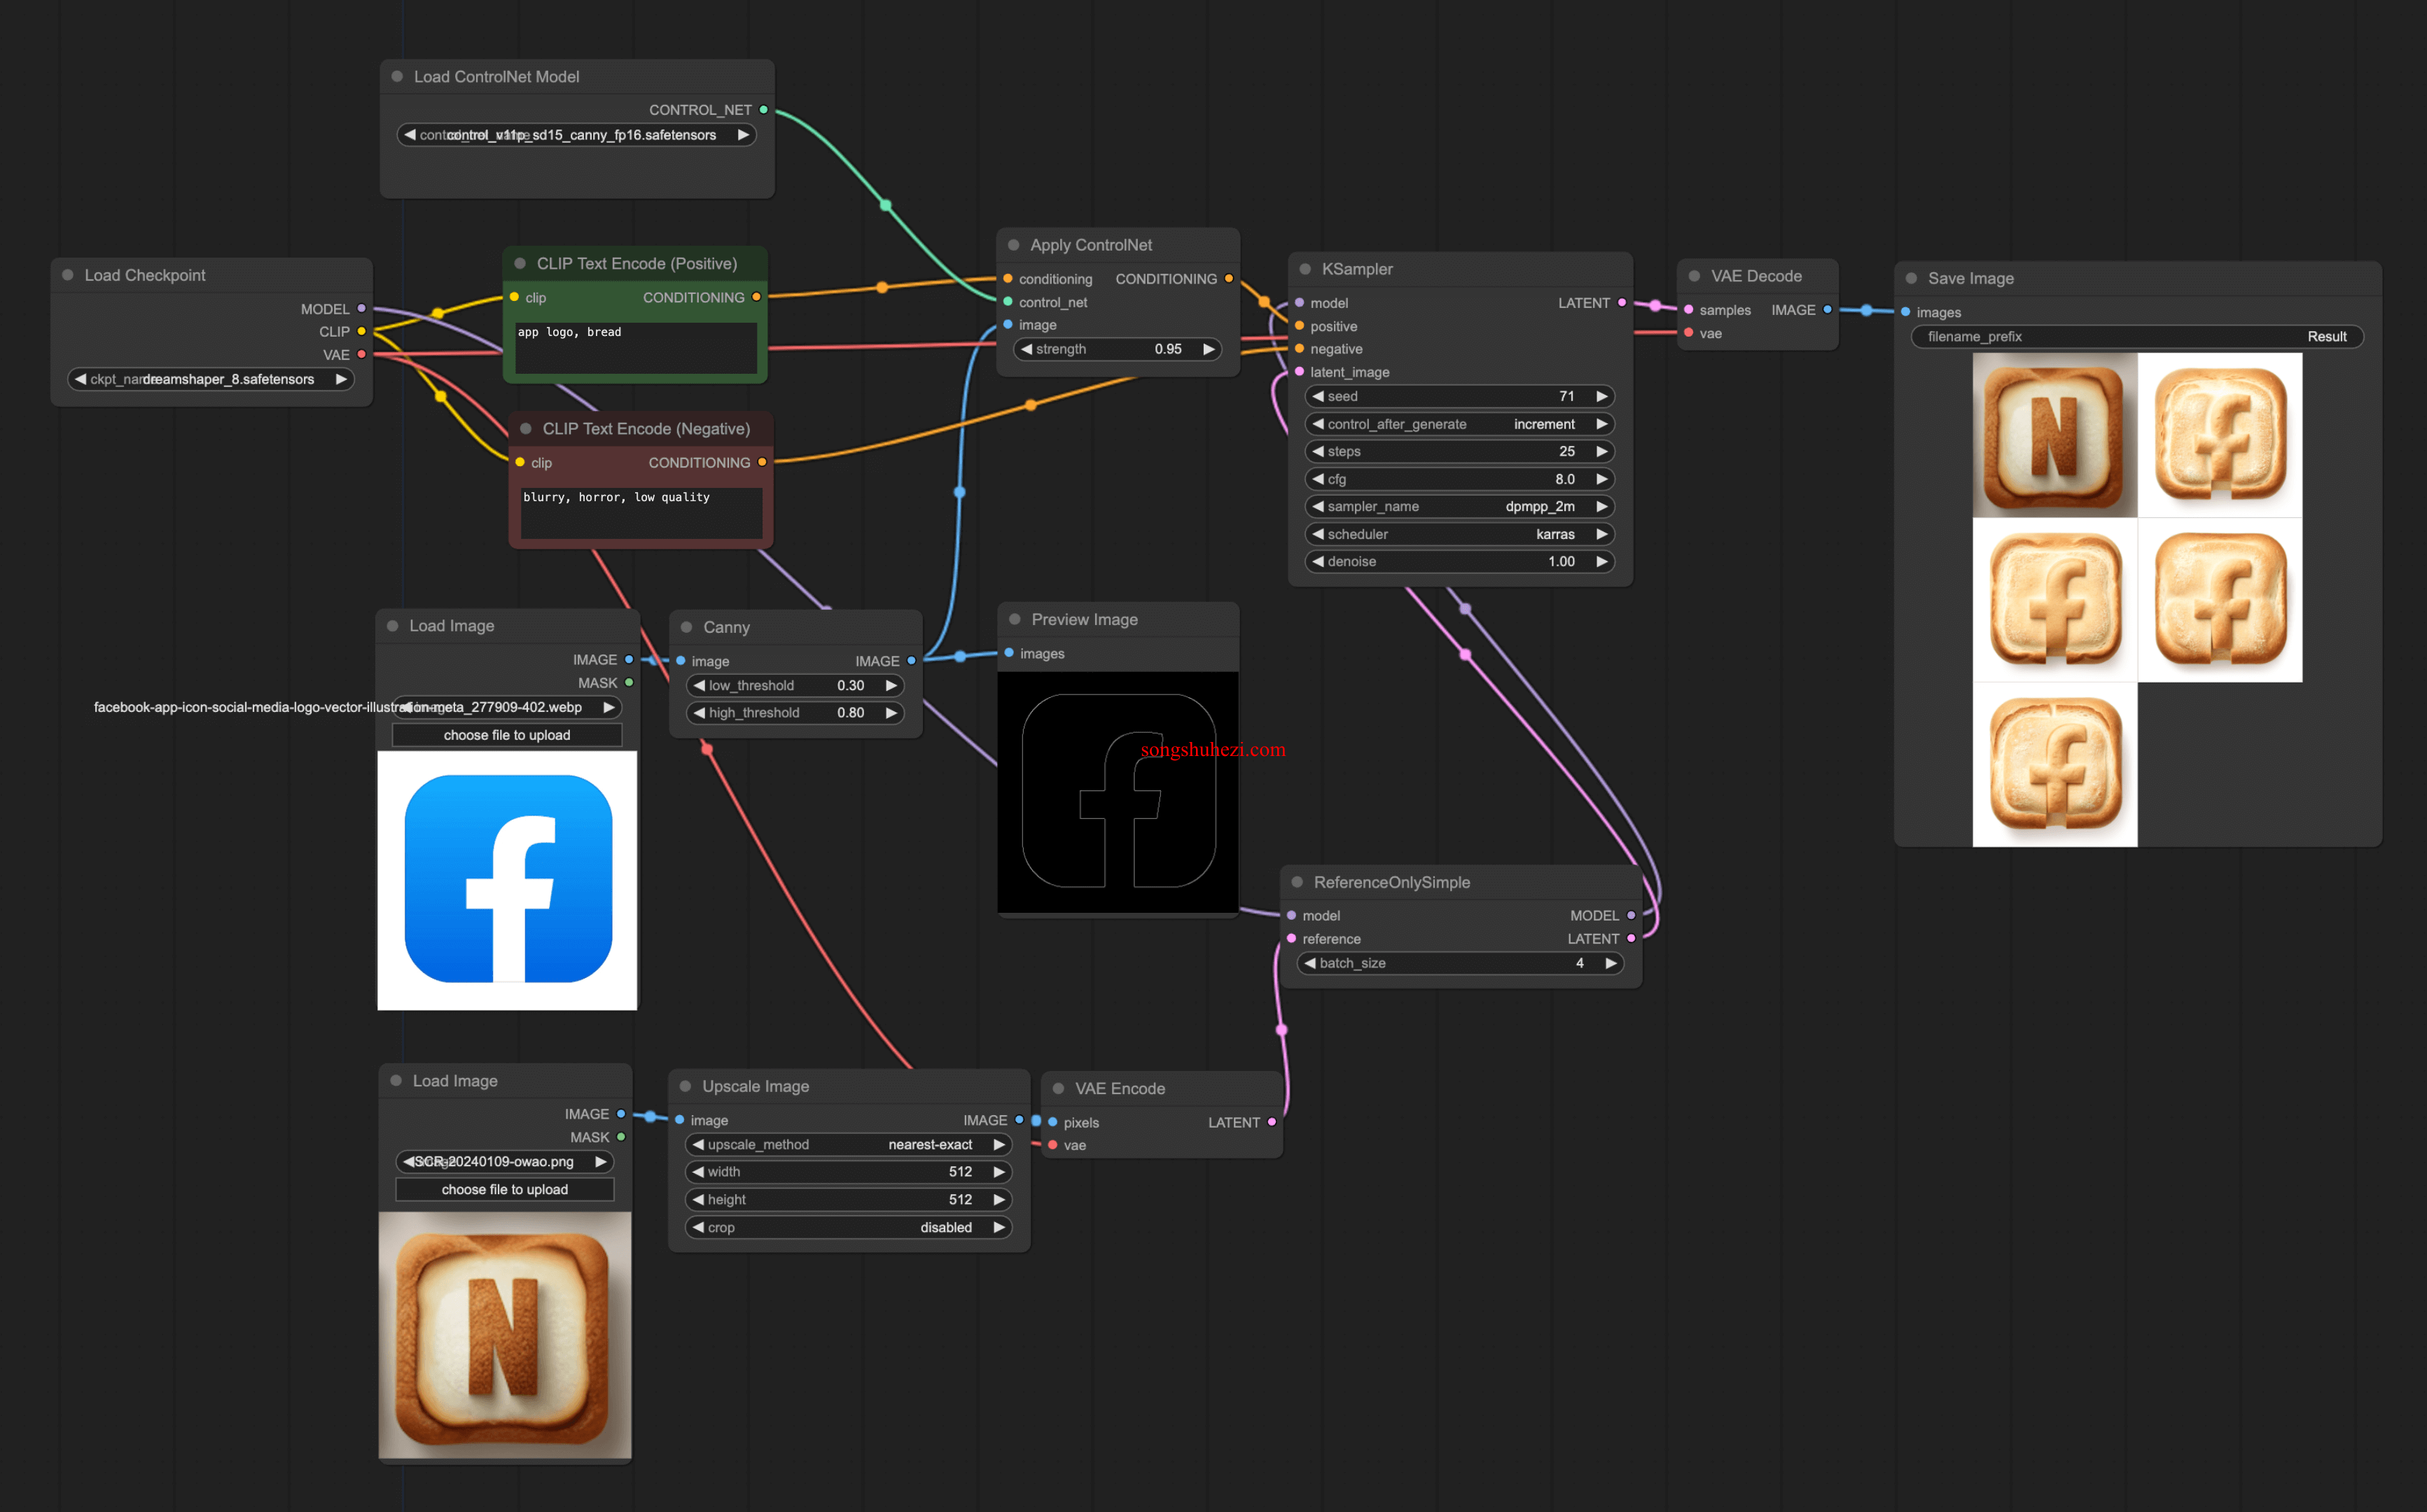
- 使用 ComfyUI 的实验性节点,如 ReferenceOnlySimple,以参考图为基础生成设计元素,例如 logo。
阅读全文
×
初次访问:反爬虫,人机识别
