EasySpider如何定时自动执行
在日常工作中,定时自动执行爬虫任务是提高工作效率的关键。EasySpider虽然没有内置的定时功能,但你可以利用操作系统自带的定时器来完成任务的定时执行。接下来,我会分别介绍在Windows、MacOS和Linux系统下如何实现这一功能。
1. Windows系统下定时执行
在Windows系统中,使用PowerShell脚本加上计划任务可以轻松实现定时任务。
步骤:
- 首先,在EasySpider图形界面中获取任务执行ID。
- 创建一个
easyspider_routine.ps1的PowerShell脚本文件,内容类似如下:
powershell
cd D:\Documents\Projects\EasySpider\Releases\EasySpider_windows_amd64\
./EasySpider/resources/app/chrome_win64/easyspider_executestage.exe --id [任务ID] --user_data 0 --server_address http://localhost:8074 --config_folder "D:\Documents\Projects\EasySpider\Releases\EasySpider_windows_amd64/" --headless 0 --read_type remote --config_file_name config.json
- 之后,通过Windows的“任务计划程序”工具设置定时执行该
.ps1文件。你可以参考这些教程进行设置:
注意: 如果你希望在不打开EasySpider程序的情况下执行任务,可以将 --read_type remote 改为 --read_type local。
2. MacOS和Linux系统下定时执行
在MacOS和Linux系统中,你可以使用Shell脚本和系统的crontab定时器来实现定时任务。

步骤:
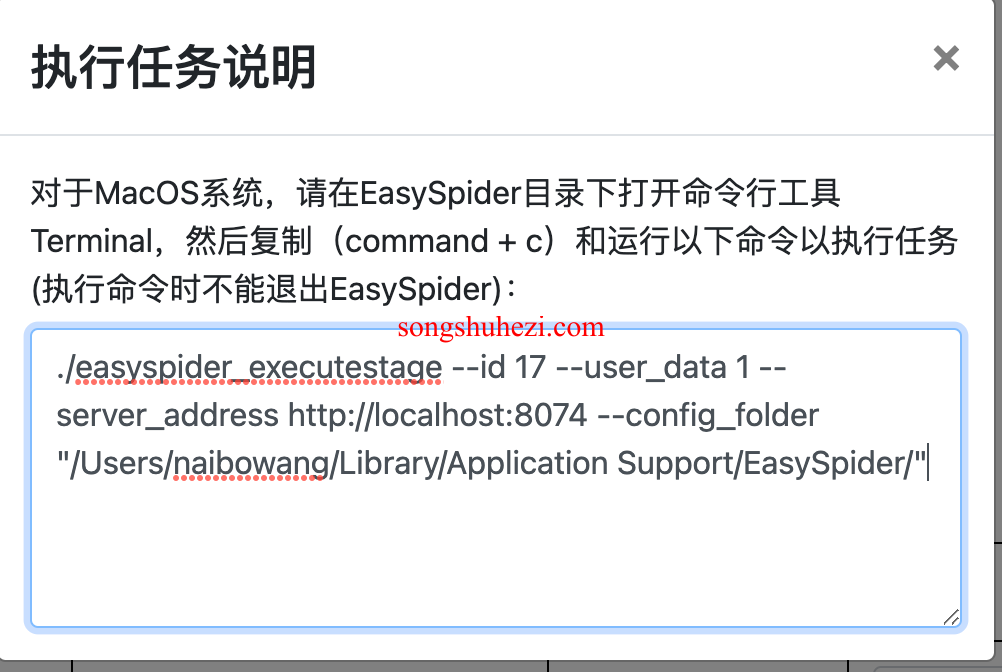
- 同样,首先获取EasySpider任务的执行ID。
- 创建一个Shell脚本文件
easyspider_routine.sh,内容如下:
bash
#!/bin/bash
cd /Users/username/Downloads/easyspider_macos_all_arch # 切换到你的EasySpider路径
./easyspider_executestage --id 17 --user_data 1 --server_address http://localhost:8074 --config_folder "/Users/username/Library/Application Support/EasySpider/" # 执行命令
- 保存后,打开终端并输入
crontab -e,在打开的文件中添加一条规则,比如每12小时执行一次:
bash
0 */12 * * * bash /Users/username/easyspider_routine.sh

保存并退出即可完成定时任务的配置。
MacOS特例:
在MacOS系统中,如果希望不打开EasySpider程序本体就能执行任务,需要在 easyspider_executestage 所在目录下创建一个 tasks 文件夹,并将任务的 .json 文件拷贝进去,然后使用 --read_type local 参数来运行任务。
3. 常见问题
如何确保任务定时执行?
确保EasySpider程序在运行,并且定时任务脚本能够正常访问任务配置文件。如果使用--read_type local模式,请确保任务文件正确放置。是否可以不打开程序本体执行任务?
是的,在MacOS和Windows上,通过设置--read_type local参数,可以实现无需打开EasySpider本体程序的任务执行。不过,你需要将任务的.json文件放入指定的tasks文件夹。
通过操作系统自带的定时任务功能,结合EasySpider的命令行执行,可以轻松实现爬虫任务的定时自动化。无论是Windows还是MacOS/Linux,步骤都非常简便。如果你需要定期获取大量数据,那么这个定时功能一定是你的得力助手!
建议大家多尝试这些方法,特别是对于需要长时间持续执行的任务,这种方式可以大大提升工作效率。


